Get Started With Podman + Mib v5.0
Quick guide to get started with Mib v5.0 using podman.
Installing Prerequisites
- sqlcmd. Click here for linux.
- podman. LINK
- mibmigrator tool. How to install and other information click here.
- Debian
- podman-compose LINK
- Rhel
- docker-compose LINK
Initial Settings
Case you decided to use docker-compose with sudo all commands in this process is mandatory to put sudo before.
Create the podman network:
DEBIAN ENVIRONMENT
podman network create mib50_getstarted_network
Download
1 Download MibV5.0 Get Started Package Debian
2 Unzip MibV5.0 Get Started Package Debian
Let's start all Mib services, first enter in directory mibv5.0_getstarted
podman-compose up -d
RHEL ENVIRONMENT
RUN IN RHEL VERSION 9 OR GREATER DON'T NEET TO CONFIGURE AND INSTALL AARTVARK!
WARNING IF RUNNING IS VERSIONS 8 YOU NEED TO CONFIGURE AND INSTALL AARTVARK AND SET NETWORK_BACKEND!
Verify host network backend format
sudo podman info --format {{.Host.NetworkBackend}}
If is not netavark you need to install aartvark
Verify if network exists mib50_getstarted_network and removed, if has any docker running drop all
You need to install all this packages, is necessary change default network rhel 8, that is CNI
sudo podman network ls
sudo podman network remove mib50_getstarted_network
sudo dnf -y install podman-plugins containernetworking-plugins
sudo dnf install aardvark-dns
sudo dnf install netavark
change network_backend value for network_backend = "netavark"
cat /usr/share/containers/containers.conf | grep network_backend
sudo nano /usr/share/containers/containers.conf
verify again, if is netavark reboot system and continue
sudo podman info --format {{.Host.NetworkBackend}}
For enable Cockpit is a web-based graphical interface for servers:
sudo dnf install cockpit
sudo systemctl enable cockpit.socket
sudo systemctl start cockpit.socket
sudo podman network create mib50_getstarted_network
1 Download MibV5.0 Get Started Package RHEL
2 Unzip MibV5.0 Get Started Package RHEL
For rhel distributions is necessary to disable SELINUX
sed -i 's|SELINUX=enforcing|SELINUX=disabled|g' "/etc/selinux/config"reboot servercheck **sestatus** if is disabled
You can enabled this for settings permissions in selinux, but here just disabled read more here LINK
Let's start all Mib services, first enter in directory mibv5.0_getstarted
sudo ln -s /usr/local/bin/docker-compose /usr/bin/docker-compose
sudo docker-compose up -d
Still inside the mibv5.0_getstarted directory, run the following commands:
Create Mib databases
DEBIAN: Reboot podman-compose for guarantee after migrations ran:
podman-compose up -d --force-recreate
RHEL: Reboot docker-compose for guarantee after migrations ran:
sudo docker-compose up -d --force-recreate
sqlcmd -S 127.0.0.1,14330 -U sa -PM3dia1B0x! -i scripts/create_db.sql
Authorization Migration
mibmigrator -assembly=MediaiBox.Core.Database.Migrations.dll -configPath=./config -section=auth
mibmigrator -assembly=MediaiBox.Cms.Authorization.Database.Migrations.dll -configPath=./config -section=auth
MibApi Migration
mibmigrator -assembly=MediaiBox.Core.Database.Migrations.dll -configPath=./config -section=content
mibmigrator -assembly=MediaiBox.Cms.Api.Database.Migrations.dll -configPath=./config -section=content
mibmigrator -assembly=MediaiBox.Cms.Api.Database.Migrations.BasicObjects.dll -configPath=./config -section=content
MibFront Migration
mibmigrator -assembly=MediaiBox.Core.Database.Migrations.dll -configPath=./config -section=front
mibmigrator -assembly=MediaiBox.Cms.FrontEnd.Database.Migrations.dll -configPath=./config -section=front
Seeds
sqlcmd -S 127.0.0.1,14330 -U sa -PM3dia1B0x! -i scripts/create_apiclient_seed.sql
sqlcmd -S 127.0.0.1,14330 -U sa -PM3dia1B0x! -i scripts/create_pages.sql
Starting Mib V5.0
Open the .env file and edit the image version and/or registry endpoint to download mib images if needed.
Open Firefox and access the url:
http://localhost:8050
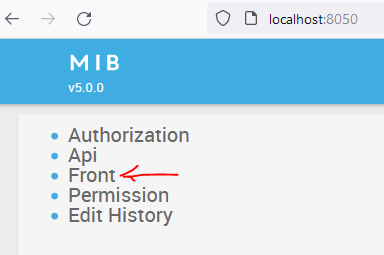
Credentials:
administrator
mediaibox
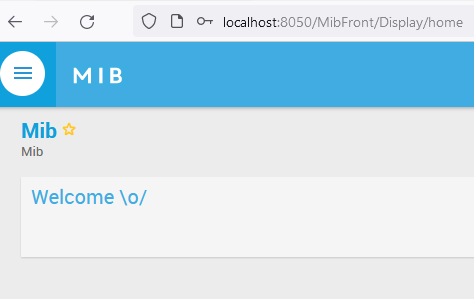
If everything went well, the Mib homepage will be displayed